
FAQs
Frequently Asked Questions about applications.
AMD GPUs in Bell and Negishi
AMD presents a serious rival for Nvidia when it comes to HPC, but Nvidia still maintains the edge for AI acceleration. Nvidia has a more mature programming framework in CUDA. But with AMD's accelerated computing framework (ROCm), AMD is catching up.
Several nodes of Bell and Negishi are equipped with AMD GPUs. To take advantage of AMD GPU acceleration, applications need to be compatible with AMD GPUs, and built with ROCm. Below are a few usage of AMD GPUs in Bell/Negishi.
Link to section 'PyTorch' of 'AMD GPUs in Bell and Negishi' PyTorch
Users can need to follow PyTorch installation guide(https://pytorch.org/get-started/locally/) to install PyTorch with AMD GPU support:
module purge
module load rocm conda
conda create -n torch-rocm
conda activate torch-rocm
conda install pytorch torchvision torchaudio -c pytorch
Once the environment is created, you may add the following commands in your job script to activate the environment:
module purge
module load rocm conda
conda activate torch-rocm
Using constraint to request specific GPUs
Gilbreth has heterogeneous hardware comprising of Nvidia V100, A100, A10, and A30 GPUs in separate sub-clusters. You can run sfeatures to check the specifications of different Gilbreth nodes:
NODELIST              CPUS   MEMORY    AVAIL_FEATURES                      GRES
gilbreth-b[000-015]   24     190000    B,b,A30,a30                         gpu:3
gilbreth-c[000-002]   20     760000    C,c,V100,v100                       gpu:4
gilbreth-d[000-007]   16     190000    D,d,A30,a30                         gpu:3
gilbreth-e[000-015]   16     190000    E,e,V100,v100                       gpu:2
gilbreth-f[000-004]   40     190000    F,f,V100,v100                       gpu:2
gilbreth-g[000-011]   128    510000    G,g,A100,a100,A100-40GB,a100-40gb   gpu:2
gilbreth-h[000-015]   32     512000    H,h,A10,a10                         gpu:3
gilbreth-i[000-004]   32     512000    I,i,A100,a100,A100-80GB,a100-80gb   gpu:2
gilbreth-j[000-001]   128    1020000   J,j,A100,a100,A100-80GB,a100-80gb   gpu:4
To run your jobs in specific nodes, you can use -C, --constraint to specify the features. Below are a few examples:
#SBATCH --constraint 'E|F'   ## request E or F nodes
#SBATCH --constraint A100    ## request A100 GPU
#SBATCH -C  "v100|a100|a30"  ## request v100, a100 or a30
MPI
SLURM can run an MPI program with the srun command. The number of processes is requested with the -n option. If you do not specify the -n option, it will default to the total number of processor cores you request from SLURM.
If the code is built with OpenMPI, it can be run with a simple srun -n command. If it is built with Intel IMPI, then you also need to add the --mpi=pmi2 option: srun --mpi=pmi2 -n 32 ./mpi_hello.
R
Link to section 'Setting Up R Preferences with .Rprofile' of 'R' Setting Up R Preferences with .Rprofile
Different clusters have different hardware and softwares. So, if you have access to multiple clusters, you must install your R packages separately for each cluster. Each cluster has multiple versions of R and packages installed with one version of R may not work with another version of R. So, libraries for each R version must be installed in a separate directory. You can define the directory where your R packages will be installed using the environment variable R_LIBS_USER.
For your convenience, a sample .Rprofile example file is provided that can be downloaded to your cluster account and renamed into /.Rprofile (or appended to one) to customize your installation preferences. Detailed instructions:
curl -#LO https://www.rcac.purdue.edu/files/knowledge/run/examples/apps/r/Rprofile_example
mv -ib Rprofile_example ~/.Rprofile
The above installation step needs to be done only once on each of the clusters you have access to. Now load the R module and run R to confirm the unique libPaths:
module load r/4.2.2
R
R> .libPaths()
[1] "/home/zhan4429/R/bell/4.2.2-gcc-9.3.0-xxbnk6s"
[2] "/apps/spack/bell/apps/r/4.2.2-gcc-9.3.0-xxbnk6s/rlib/R/library"
Link to section 'Challenging packages' of 'R' Challenging packages
Below are packages users may have difficulty in installation.
Link to section 'nloptr' of 'R' nloptr
In Bell, the installation may fail due to the default cmake version is too old. The solution is easy, users just need to load the newer versions of cmake:
module load cmake/3.20.6
module load r
Rscript -e 'install.packages("nloptr")'
In Brown or other older clusters, because our system's cmake and gcc compilers are old, we may not be able to install the latest version of nloptr. The walkaround is that users can install the older versions of nloptr:
module load r
R
 > myrepos = c("https://cran.case.edu")
 > install.packages("devtools", repos = myrepos)
 > library(devtools)
 > install_version("nloptr", version = "> 1.2.2, < 2.0.0", repos = myrepos)
Link to section 'Error: C++17 standard requested but CXX17 is not defined' of 'R' Error: C++17 standard requested but CXX17 is not defined
When users want to install some packages, such as colourvalues, the installation may fail due to Error: C++17 standard requested but CXX17 is not defined. Please follow the below command to fix it:
module load r
module spider gcc
module load gcc/xxx  ## the lateste gcc is recommended
mkdir -p ~/.R
echo 'CXX17 = g++ -std=gnu++17 -fPIC' > ~/.R/Makevars
R
> install.packages("xxxx")
Link to section 'RCurl' of 'R' RCurl
Some R packages rely on curl. When you install these packages such as RCurl, you may see such error: checking for curl-config... no Cannot find curl-config To install such packages, you need to load the curl module:
module load curl
module load r
R
> install.packages("RCurl")
Link to section 'raster, stars and sf' of 'R' raster, stars and sf
These R packages have some dependencies. To install them, users will need to load several modules. Note that these modules have multiple versions, and the latest version is recommended. However, the default version may not be the latest version. To check the latest version, please run module spider XX.
module spider gdal
module spider geos
module spider proj
module spider sqlite

module load gdal/XXX geos/XXX proj/XXX sqlite/XXX  ## XXX is the version to use. The latest version is recommended.
module load r/XXX
R
> install.packages("raster")
  install.packages("stars")
  install.packages("sf")
Many-Task Computing using HyperShell
HyperShell is an elegant, cross-platform, high-throughput computing utility for processing shell commands over a distributed, asynchronous queue. It is a highly scalable workflow automation tool for many-task scenarios.
Several tools offer similar functionality but not all together in a single tool with the user ergonomics we provide. Novel design elements include but are not limited to (1) cross-platform, (2) client-server design, (3) staggered launch for large scales, (4) persistent hosting of the server, and optionally (5) a database in-the-loop for persisting task metadata and automated retries.
HyperShell is pure Python and is tested on Linux, macOS, and Windows 10 in Python 3.9 and 3.10 environments. The server and client don’t even need to use the same platform simultaneously.
Detailed usage can be found here: https://hypershell.readthedocs.io/en/latest/
Link to section 'Cluster' of 'Many-Task Computing using HyperShell' Cluster
Start the cluster either locally or with remote clients over ssh or a custom launcher. This mode should be the most common entry-point for general usage. It fully encompasses all of the different agents in the system in a concise workflow.
The input source for tasks is file-like, either a local path, or from stdin if no argument is given. The command-line tasks are pulled in and either directly published to a distributed queue (see --no-db) or committed to a database first before being scheduled later.
For large, long running workflows, it might be a good idea to configure a database and run an initial submit job to populate the database, and then run the cluster with --restart and no input FILE. If the cluster is interrupted for whatever reason it can gracefully restart where it left off.
A simple user case is that users just need to privde a taskfile containing commands/tasks. Each line is one command/task. Below is a batch jobscript that can used in ACCESS Anvil cluster:
#!/bin/bash

#SBATCH -A AllocationName
#SBATCH -N 1
#SBATCH -n 1
#SBATCH -c 64
#SBATCH -p shared
#SBATCH --time=4:00:00
#SBATCH --job-name=trim-galore
#SBATCH --error=%x-%J-%u.err
#SBATCH --output=%x-%J-%u.out
#SBATCH --mail-type=ALL

module load hyper-shell

hs cluster Taskfile.txt \
        -o trim_Taskfile.output \
        -f trim_Taskfile.failed \
        -N 16 ## Number of tasks to run simultaneously
Below are contents of Taskfile.txt that I want to run a bioinformatics application called Trim-galore:
trim_galore ---fastqc -j 4 -q 25 --paired seq1_1.fastq seq1_2.fastq -o trim_out && echo task1 success
trim_galore ---fastqc -j 4 -q 25 --paired seq2_1.fastq seq2_2.fastq -o trim_out && echo task2 success
trim_galore ---fastqc -j 4 -q 25 --paired seq3_1.fastq seq3_1.fastq -o trim_out && echo task3 success
trim_galore ---fastqc -j 4 -q 25 --paired seq4_1.fastq seq4_2.fastq -o trim_out && echo task4 success
trim_galore ---fastqc -j 4 -q 25 --paired seq5_1.fastq seq5_2.fastq -o trim_out && echo task5 success
trim-galore ---fastqc -j 4 -q 25 --paired seq6_1.fastq seq6_2.fastq -o trim_out && echo task6 success
In the slurm jobscript, we request 64 CPUs and 16 tasks (-N 3) to run simultaneously. Each trim_galore task will use 4 CPUs (-j 4). So that we can efficiently use all 64 CPUs. The task1-16 will run when the hypershell job starts. If any of the first 16 tasks completes, task17 will start, and so on until all tasks complete.
You may notice that in task6, there is a typo. The command should be trim_galore instead of trim-galore. So this taks will fail. Since we used -f trim_Taskfile.failed in the hypershell command, task6 will be saved to trim_Taskfile.failed. This can help you track which tasks are successful and which ones fail.
Julia package installation
Users do not have write permission to the default julia package installation destination. However, users can install packages into home directory under ~/.julia.
Users can side step this by explicitly defining where to put julia packages:
$ export JULIA_DEPOT_PATH=$HOME/.julia
$ julia -e 'using Pkg; Pkg.add("PackageName")'
Jupyter kernel creation
JupyterLab is the latest web-based interactive development environment for notebooks, code, and data. Its flexible interface allows users to configure and arrange workflows in data science, scientific computing, computational journalism, and machine learning. The Jupyter Notebook is the original web application for creating and sharing computational documents.
Both JupyterLab and Jupyter Notebook are supported on Open OnDemand of RCAC clusters. This tutorial will introduce how to create a personal kernal using the terminal, then run python codes on Open OnDemand Jupyter with the newly created kernel.
To facilitate the process, we provide a script conda-env-mod that generates a module file for an environment, as well as an optional Jupyter kernel to use this environment in Jupyter.
Link to section 'Step1: Load the anaconda module' of 'Jupyter kernel creation' Step1: Load the anaconda module
You must load one of the anaconda modules in order to use this script:
module spider anaconda
module load anaconda/xxxx    ## choose the anaconda and python version you want to use
Link to section 'Step 2: Create a conda environment' of 'Jupyter kernel creation' Step 2: Create a conda environment
By default, conda-env-mod will only create the environment and a module file(no Jupyter kernel). If you plan to use your environment in a Jupyter, you need to append a --jupyter flag:
conda-env-mod create -n mypackages --jupyter
Link to section 'Step 3: Load the conda environment' of 'Jupyter kernel creation' Step 3: Load the conda environment
The following instructions assume that you have used conda-env-mod script to create an environment named mypackages:
module load use.own
module load conda-env/mypackages-py3.8.5 # py3.8.5 is associated with the python in the loaded anaconda module.
Link to section 'Step 4: Install packages' of 'Jupyter kernel creation' Step 4: Install packages
Now you can install custom packages in the environment using either conda install or pip install:
conda install Package1
pip install Package2
Link to section 'Step 5: Open OnDemand Jupyter' of 'Jupyter kernel creation' Step 5: Open OnDemand Jupyter
In Jupyter Lab or Jupter Notebook of Open OnDemand, you can create a new notebook with the newly created kernel.
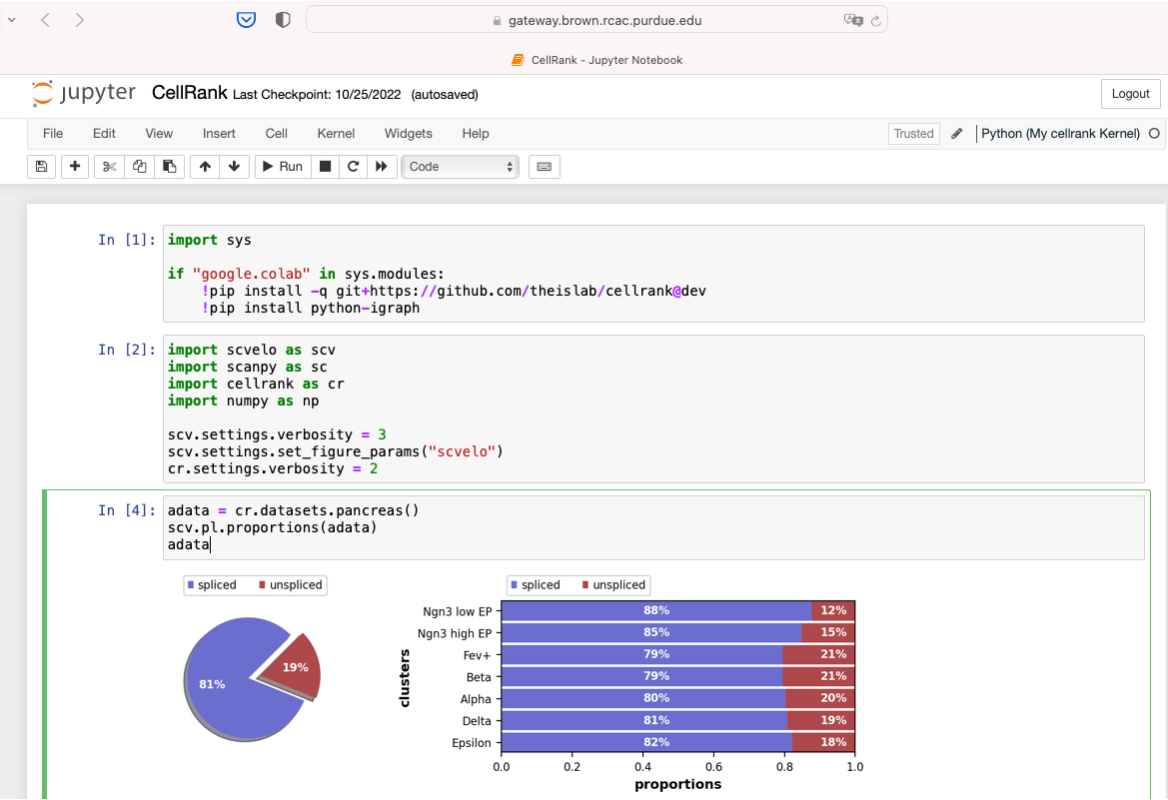
Link to section 'Example: CellRank' of 'Jupyter kernel creation' Example: CellRank
CellRank is a toolkit to uncover cellular dynamics based on Markov state modeling of single-cell data (https://github.com/theislab/cellrank).
Create a conda environment with Jupyter kernel:
module load anaconda/2020.11-py38
conda-env-mod create -n cellrank --jupyter
Next we can load the module, and install CellRank:
module load use.own
module load conda-env/cellrank-py3.8.5
conda install -c conda-forge -c bioconda cellrank
Select the newly created kernel Python(My cellrank Kernel) in Jupyter Notebook or Jupyter Lab.

Now we can use Python(My cellrank Kernel) to run scRNAseq analysis.
Disk quota exhausted
On RCAC clusters, each user's $HOME only has a quota of 25GB. $HOME is the ideal place to store important scripts, executables, but it should not be used to run jobs and store data of large size. If the quota of $HOME is exhausted, it will have a big affect and users even cannot submit or run jobs.
Link to section 'ncdu' of 'Disk quota exhausted' ncdu
RCAC has deployed a nice and easy tool called ncdu to help users check sizes of files and subdirectories in a specific directory. For example, if users want to check which files/folders occupy how much disk quota of $HOME, you can easily run ncdu like this:
$ ncdu $HOME
You will see results similar to this:
ncdu 1.17 ~ Use the arrow keys to navigate, press ? for help
--- /home/zhan4429 -------------------------------------------------------------
  3.3 GiB [###########] /.singularity
  1.4 GiB [####       ] /myapps
  1.1 GiB [###        ] /Fidelity
  776.8 MiB [##         ] /projects
  240.9 MiB [           ] /.local
  177.9 MiB [           ] /R
  174.9 MiB [           ] /git
  113.8 MiB [           ] /Downloads
  107.4 MiB [           ] /.vscode-server
  101.2 MiB [           ] /svn
   72.4 MiB [           ] /spack
   35.4 MiB [           ]  cpu-percent.log
   35.0 MiB [           ] /.celltypist
   33.9 MiB [           ] /Desktop
   32.9 MiB [           ] /alphafold
There are a few hidden directory can occpuy a lot of disk space, including ~/.cache, ~/.conda/pkgs, and .singularity/cache. Since these folders just contain cache files, it is safe to delete them.
glibc
When you try to install some software on clusters, the installation may fail due to reasons similar to this: "XX requires libc version 2.27 or at least 2.23, but the current version is 2.17". Unfortunately, glibc is bundled with the operation system, and we cannot update it for you.
To check the version of glibc on our cluster, you can run the below command:
$ ldd --version
ldd (GNU libc) 2.17
Copyright (C) 2012 Free Software Foundation, Inc.
This is free software; see the source for copying conditions.  There is NO
warranty; not even for MERCHANTABILITY or FITNESS FOR A PARTICULAR PURPOSE.
Written by Roland McGrath and Ulrich Drepper.
Link to section 'Workaround' of 'glibc' Workaround
- Singularity containers
- Install an older version of your software
Large memory jobs
One bonus for purchasing regular nodes of HPC clusters is that users will have access to large memory nodes of 1TB. As memory is evenly distributed among all the available cores, so each core is tied with about 8GB(1024 GB/128 cores) memory. This can be very useful for jobs with a large data set. Using the command slist , users can see that the queue name of large memory nodes is highmemand the max walltime is 24 hours. Note that the large memory nodes are shared by all users, so we will not extend walltime for users.
user@cluster-fe04:~ $ slist

                      Current Number of Cores                       Node
Account           Total    Queue     Run    Free    Max Walltime    Type
==============  =================================  ==============  ======
debug               256      249       0     256        00:30:00       A
gpu                 512      128     256     256                       G
highmem            1024      368     590     434      1-00:00:00       B
multigpu             48        0       0      48                       G
rcac-b             1024        0       0    1024     14-00:00:00       B
standby           46976     1600    4563   11552        04:00:00       A
Link to section 'Example script for large memory jobs' of 'Large memory jobs' Example script for large memory jobs
#!/bin/bash
#SBATCH -A highmem
#SBATCH -t 12:00:00
#SBATCH -N 1
#SBATCH -n 12
#SBATCH --job-name=alphafold
#SBATCH --mail-type=FAIL,BEGIN,END
#SBATCH --error=%x-%J-%u.err
#SBATCH --output=%x-%J-%u.out


module --force purge
ml biocontainers alphafold/2.3.1

run_alphafold.sh --flagfile=full_db_20230311.ff  \
    --fasta_paths=sample.fasta --max_template_date=2022-02-01 \
    --output_dir=af2_full_out --model_preset=monomer \
    --use_gpu_relax=False