
Examples
Examples of deploying a database with persistent storage and making it available on the network and deploying a webserver using a self-assigned URL.
Database
Link to section 'Deploy a postgis Database' of 'Database' Deploy a postgis Database
- Select your Project from the top right dropdown
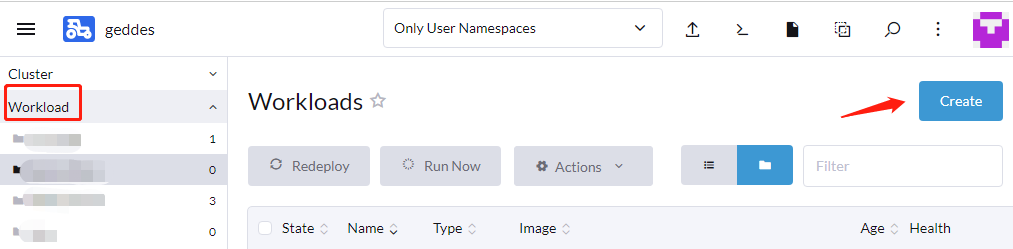
- Using the far left menu, select Workload
- Click Create at the top right
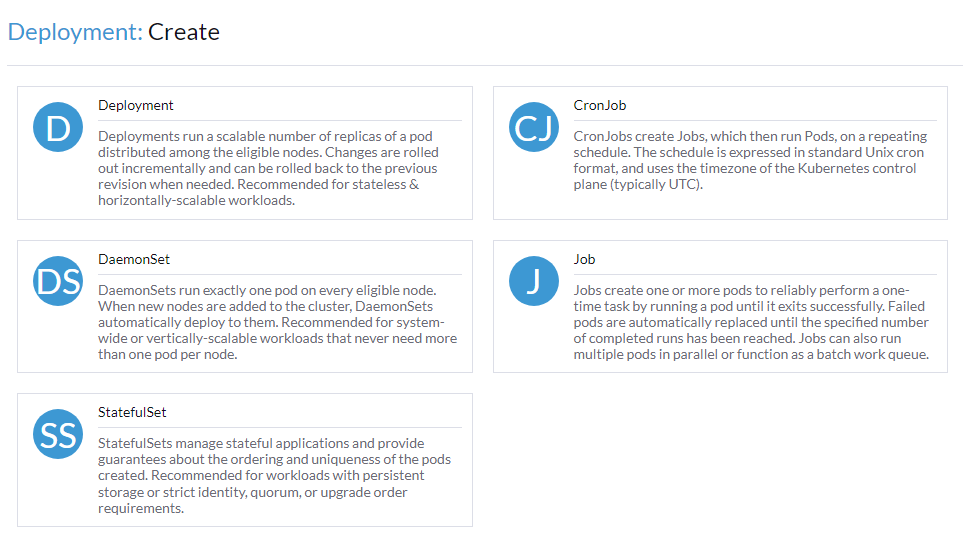
- Select the appropriate Deployment Type for your use case, here we will select and use Deployment
- Fill out the form
- Select Namespace
- Give arbitrary Name
- Set Container Image to the postgis Docker image:
geddes-registry.rcac.purdue.edu/docker-hub-cache/postgis/postgis:latest - Set the postgres user password
- Select the Add Variable button under the Environment Variables section
- Fill in the fields Variable Name and Value so that we have a variable
POSTGRES_PASSWORD = <some password>
- Create a persistent volume for your database
- Select the Storage tab from within the current form on the left hand side
- Select Add Volume and choose Create Persistent Volume Claim
- Give arbitrary Name
- Select Single-Node Read/Write
- Select appropriate Storage Class from the dropdown and give Capacity in GiB e.g 5
- Provide the default postgres data directory as a Mount Point for the persistent volume
/var/lib/postgresql/data - Set Sub Path to
data
- Set resource CPU limitations
- Select Resources tab on the left within the current form
- Under the CPU Reservation box fill in
2000This ensures that Kubernetes will only schedule your workload to nodes that have that resource amount available, guaranteeing your application has 2CPU cores to utilize - Under the CPU Limit box also will in 2000 This ensures that your workload cannot exceed or utilize more than 2CPU cores. This helps resource quota management on the project level.
- Setup Pod Label
- Select Labels & Annotations on the left side of the current form
- Select Add Label under the Pod Labels section
- Give arbitrary unique key and value you can remember later when creating Services and other resources e.g Key:
my-dbValue:postgis
- Select Create to launch the postgis database
Wait a couple minutes while your persistent volume is created and the postgis container is deployed. The “does not have minimum availability” message is expected. But, waiting more than 5 minutes for your workload to deploy typically indicates a problem. You can check for errors by clicking your workload name (i.e. "mydb"), then the lower button on the right side of your deployed pod and selecting View Logs If all goes well, you will see an Active status for your deployment
Link to section 'Expose the Database to external clients' of 'Database' Expose the Database to external clients
Use a LoadBalancer service to automatically assign an IP address on a private Purdue network and open the postgres port (5432). A DNS name will automatically be configured for your service as <servicename>.<namespace>.geddes.rcac.purdue.edu.
- Using the far left menu and navigate to Service Discovery > Services
- Select Create at the top right
- Select Load Balancer
- Fill out the form
- Ensure to select the namespace where you deployed the postgis database
- Give a Name to your Service. Remember that your final DNS name when the service creates will be in the format of
<servicename>.<namespace>.geddes.rcac.purdue.edu - Fill in Listening Port and Target Port with the postgis default port 5432
- Select the Selectors tab within the current form
- Fill in Key and Value with the label values you created during the Setup Pod Label step from earlier e.g Key:
my-dbValue:postgis - IMPORTANT: The yellow bar will turn green if your key-value pair matches the pod label you set during the "Setup Pod Label" deployment step above. If you don't see a green bar with a matching Pod, your LoadBalancer will not work.
- Fill in Key and Value with the label values you created during the Setup Pod Label step from earlier e.g Key:
- Select the Labels & Annotations tab within the current form
- Select Add Annotation
- To deploy to a Purdue Private Address Range fill in Key:
metallb.universe.tf/address-poolValue:geddes-private-pool - To deploy to a Public Address Range fill in Key:
metallb.universe.tf/address-poolValue:geddes-public-pool
Kubernetes will now automatically assign you an IP address from the Geddes private IP pool. You can check the IP address by hovering over the “5432/tcp” link on the Service Discovery page or by viewing your service via kubectl on a terminal.
$ kubectl -n <namespace> get services
Verify your DNS record was created:
$ host <servicename>.<namespace>.geddes.rcac.purdue.edu
Web Server
Link to section 'Nginx Deployment' of 'Web Server' Nginx Deployment
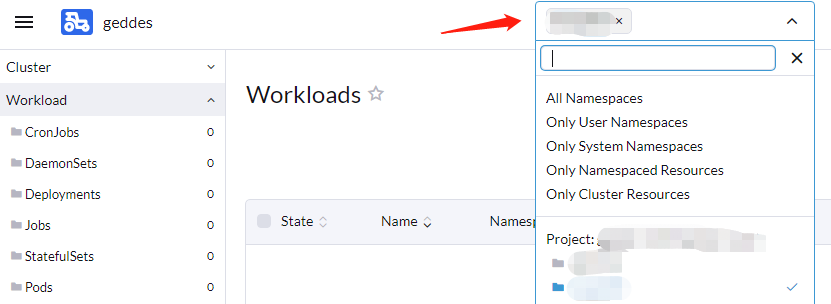
- Select your Project from the top right dropdown
- Using the far left menu so select Workload
- Click Create at the top right
- Select the appropriate Deployment Type for your use case, here we will select and use Deployment
- Fill out the form
- Select Namespace
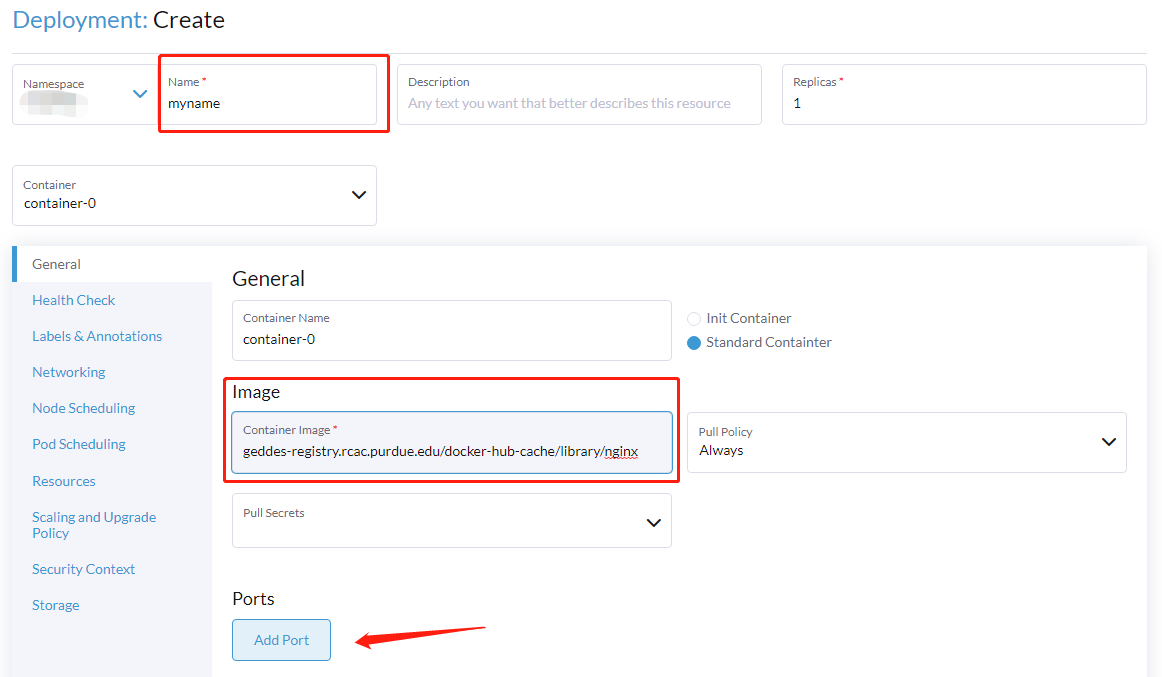
- Give arbitrary Name
- Set Container Image to the nginx Docker image:
geddes-registry.rcac.purdue.edu/docker-hub-cache/library/nginx - Create a Cluster IP service to point our external accessible ingress to later
- Click Add Port
- Click Service Type and with the drop select Cluster IP
- In the Private Container Port box type 80

- Setup Pod Label
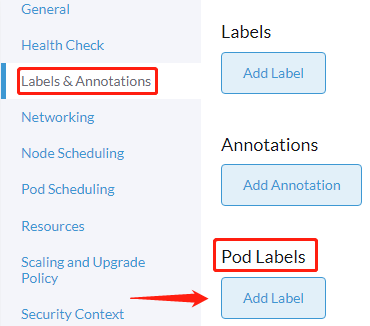
- Select Labels & Annotations on the left side of the current form
- Select Add Label under the Pod Labels section
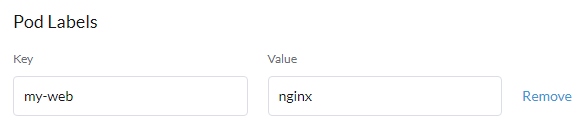
- Give arbitrary unique key and value you can remember later when creating Services and other resources e.g Key:
my-webValue:nginx
- Click Create
Wait a couple minutes while your application is deployed. The “does not have minimum availability” message is expected. But, waiting more than 5 minutes for your workload to deploy typically indicates a problem. You can check for errors by clicking your workload name (i.e. "mywebserver"), then using the vertical ellipsis on the right hand side of your deployed pod and selecting View Logs
If all goes well, you will see an Active status for your deployment.
Link to section 'Expose the web server to external clients via an Ingress' of 'Web Server' Expose the web server to external clients via an Ingress
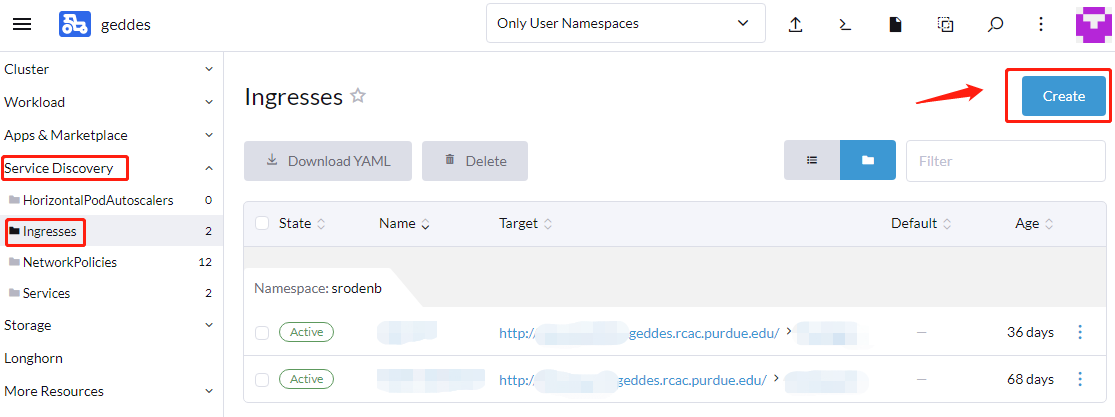
- Using the far left menu and navigate to Service Discovery > Ingresses and select Create at the top right
- Fill out the form
- Ensure to select the namespace where you deployed the nginx
- Give an arbitrary Name
- Under Request Host give the url you want for your web application e.g
my-nginx.geddes.rcac.purdue.edu - Fill in the value Path > Prefix as
/ - Use the Target Service and ;Port dropdowns to select the service you created during the Nginx Deployment section
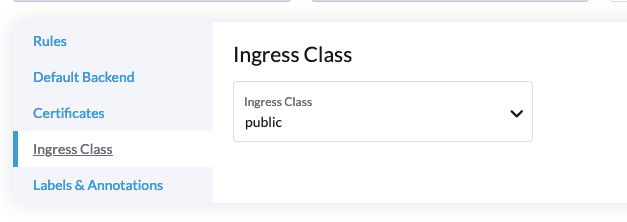
- The default Ingress is private, which is only accessible within Purdue network. To make a public one, change the Ingress Class to
public:

R Shiny
This guide provides instructions on how to build a Docker image for an R Shiny application, push it to the Geddes Registry and deploy it on Geddes.
Link to section 'Create an RShiny Docker Image' of 'R Shiny' Create an RShiny Docker Image
Create a local Dockerfile by saving the following Dockerfile to your computer and editing the contents for your R Shiny App.
FROM rocker/shiny

# install R package dependencies
RUN apt-get update && apt-get install -y \
    libssl-dev \
    git \
    ## clean up
    && apt-get clean \
    && rm -rf /var/lib/apt/lists/ \
    && rm -rf /tmp/downloaded_packages/ /tmp/*.rds

## Install any R packages you need
RUN install2.r --error \
        <package 1> \
        <package 2> \
        <package 3> \
    ## clean up
    && rm -rf /tmp/downloaded_packages/ /tmp/*.rds

## copy shiny app to shiny server location
COPY ./<app directory> /srv/shiny-server/
Link to section 'Docker Build and Testing Process' of 'R Shiny' Docker Build and Testing Process
Build the Docker image locally based on the Dockerfile above. The Dockerfile must be in your current working directory. This command tags the image with the name "myshinyapp" and version 1.0.
docker build -t myshinyapp:1.0 .Test your application locally. This command will run your container locally and expose the R Shiny port (3838) so it can be accessed via http://localhost:3838 in your web browser.
On Linux or Mac: docker run --network=host myshinyapp:1.1
On Windows: docker run -p 3838:3838 myshinyapp:1.1
Iterate on code changes locally until you want to deploy on Geddes.
Link to section 'Tag and Upload to the Geddes Registry' of 'R Shiny' Tag and Upload to the Geddes Registry
Tag the image for upload to the Geddes Registry
docker tag myshiny:1.0 geddes-registry.rcac.purdue.edu/<repo>/myshinyapp:1.0Push the image to the Geddes Registry. Run the login command using your Purdue career account username and password if you currently are not authenticated to the registry.
docker login geddes-registry.rcac.purdue.edudocker push geddes-registry.rcac.purdue.edu/<repo>/myshinyapp:1.0Link to section 'Deploy the Application on Geddes' of 'R Shiny' Deploy the Application on Geddes
To deploy the application, one can follow the instructions for deploying a web server and replace the image name with the Geddes registry image tag from above: geddes-registry.rcac.purdue.edu/<repo>/myshinyapp:1.0